

DIY Paw Print Frame
I should’ve known people would be into a DIY paw print frame! This project is so easy, you can knock it out by Mother’s Day!
I actually created the framed prints last Mother’s Day! Which how coincidental is that? And how did I not think to share it as Mother’s Day is right around the corner & animal moms deserve acknowledgment too! I had the idea to frame Bernice’s paw prints in the empty frames that we had hanging in our living room, but I never found the time or energy to make what I was imagining happen, so the frames stayed empty. Last Mother’s Day Wafiq put a block on our calendar to actually try my idea, as a gift to me! I loved it, this project is actually a great family activity. I value time more than anything else so that was a perfect Mother’s Day gift because we all got to do it together. Anyone else prefer an activity like that over something monetary?
I think you could do this project with any animal that has feet, you can test that theory & let me know.
DIY Paw Print Frame Steps:
NEED:
20 Sheets of 8.5 x 11 White Printer Paper (here)
Black Washable Kids Paint (here or here)
Additional Color Washable Kids Paint, I used coral (similar here)
Flat, Square Container (here)
Large Bowl with Water
An Animal (here)
Copy Machine, either at home or FedEx will work
Frames (I have these: here)
DIRECTIONS:
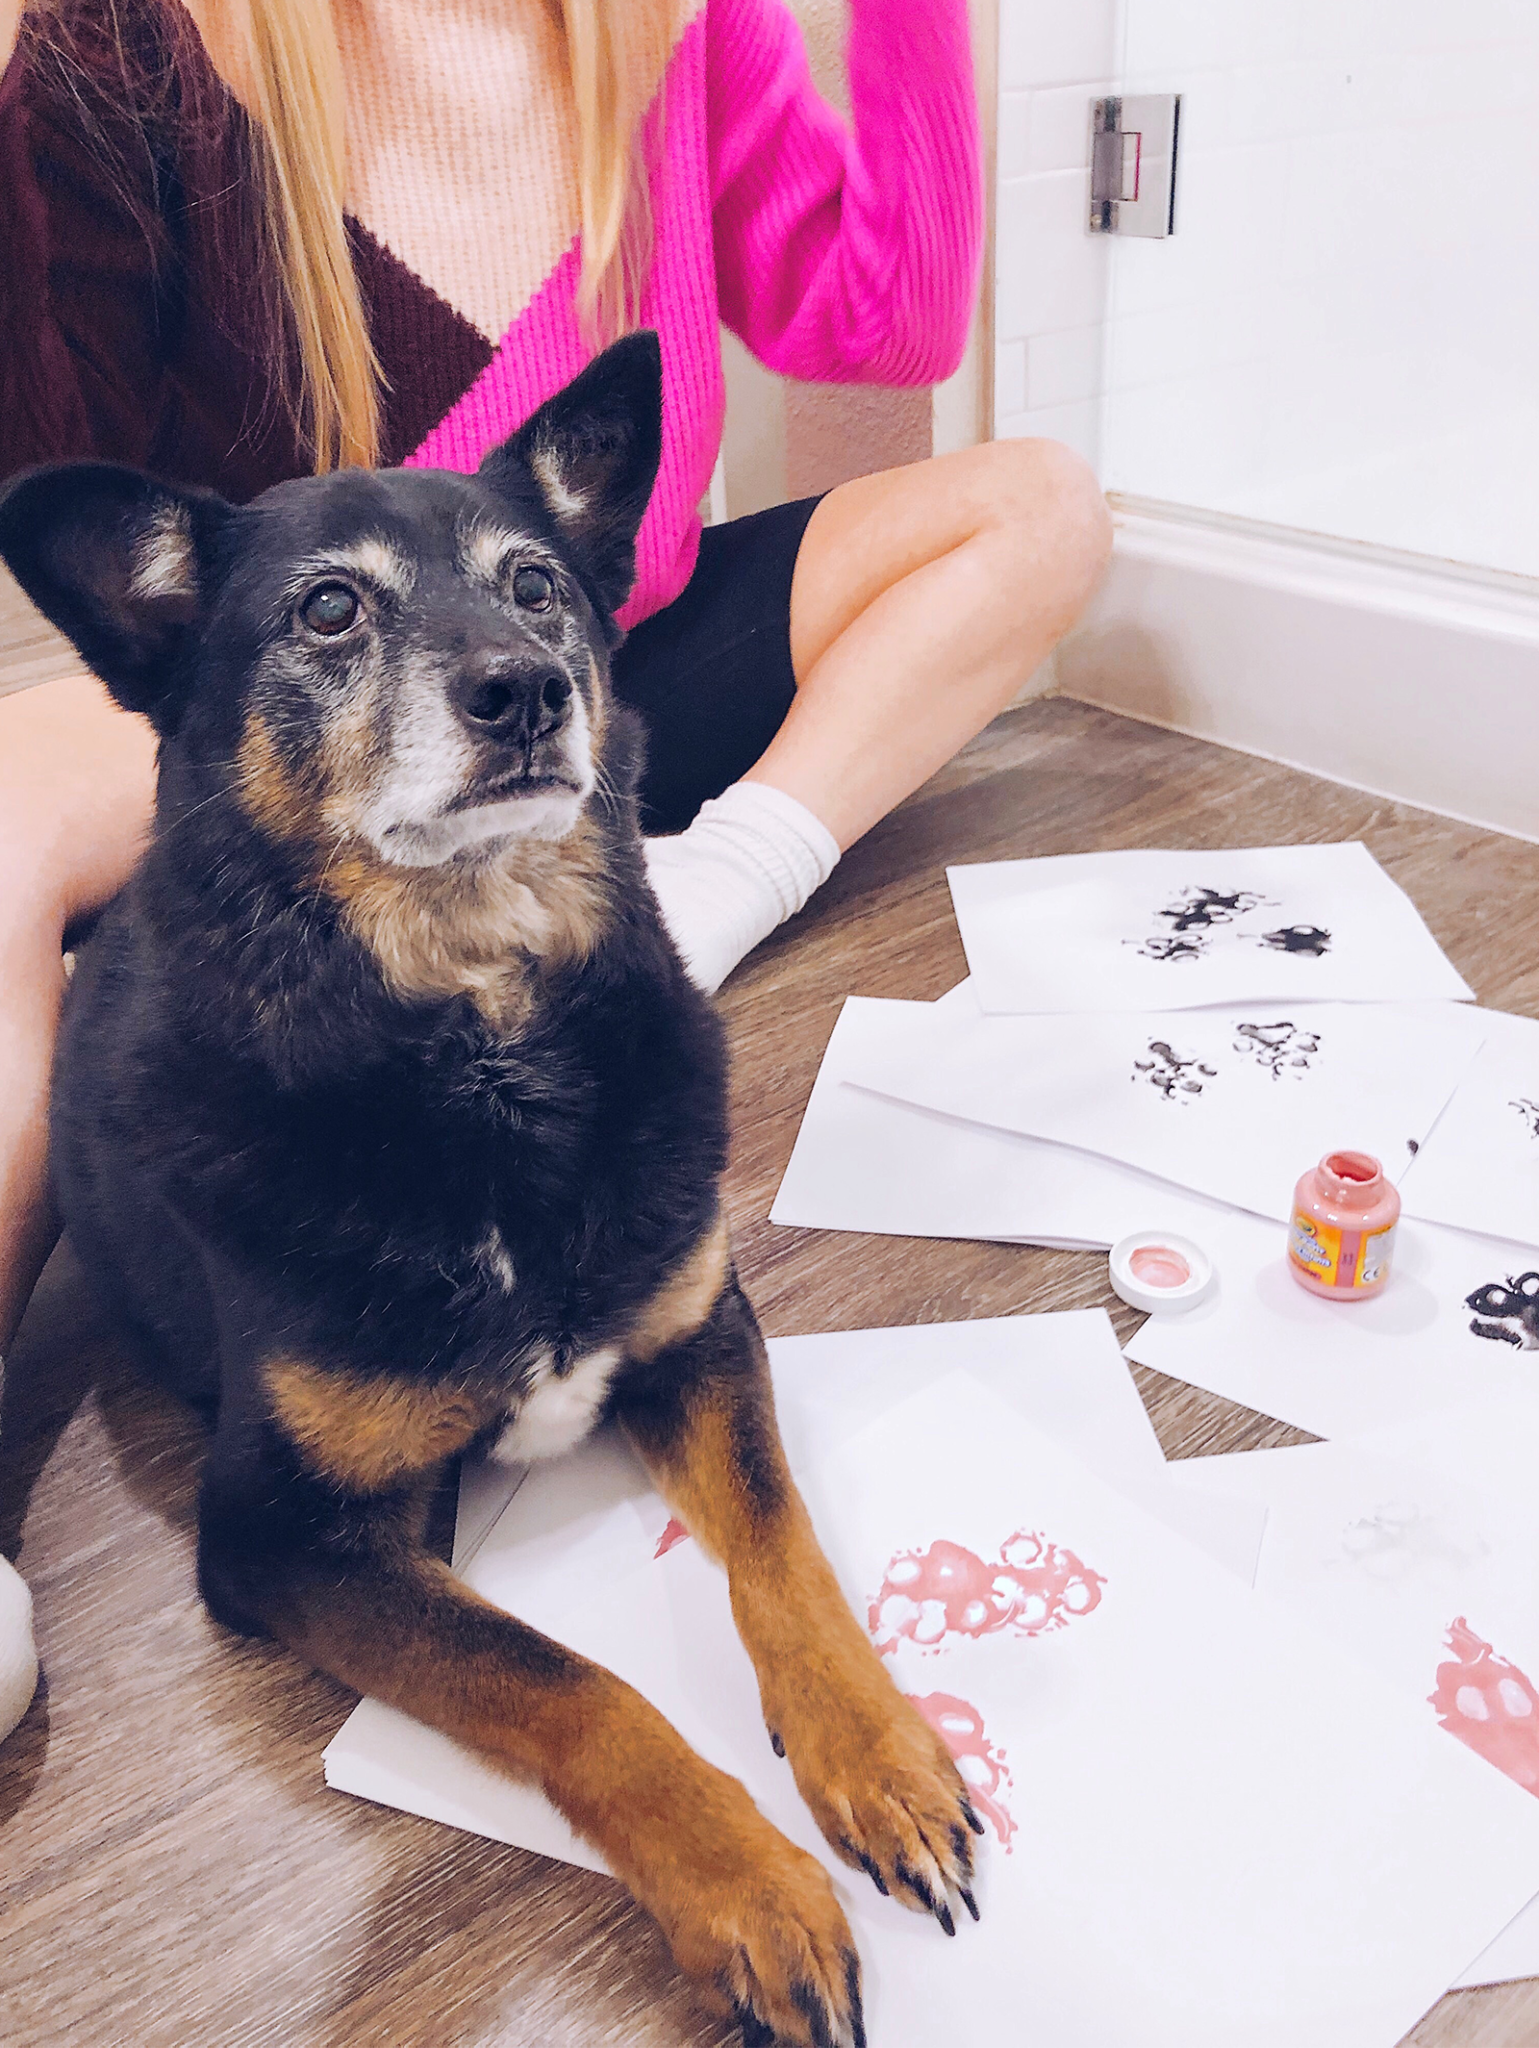
- Find a Large, clean Flat Surface. Somewhere you’ll feel comfortable making a mess but will easily be able to clean it up. I wanted to do this inside so the prints would be clean, without the risk of wind or dirt, so I used the bathroom floor.
- Prep your Supplies. You don’t want your animal bothered until all your supplies are in place. Grab your sheets of paper & put them in a stack on the floor, get your Tupperware, have your paints nearby, fill your large bowl with water, and keep a dry towel on standby.
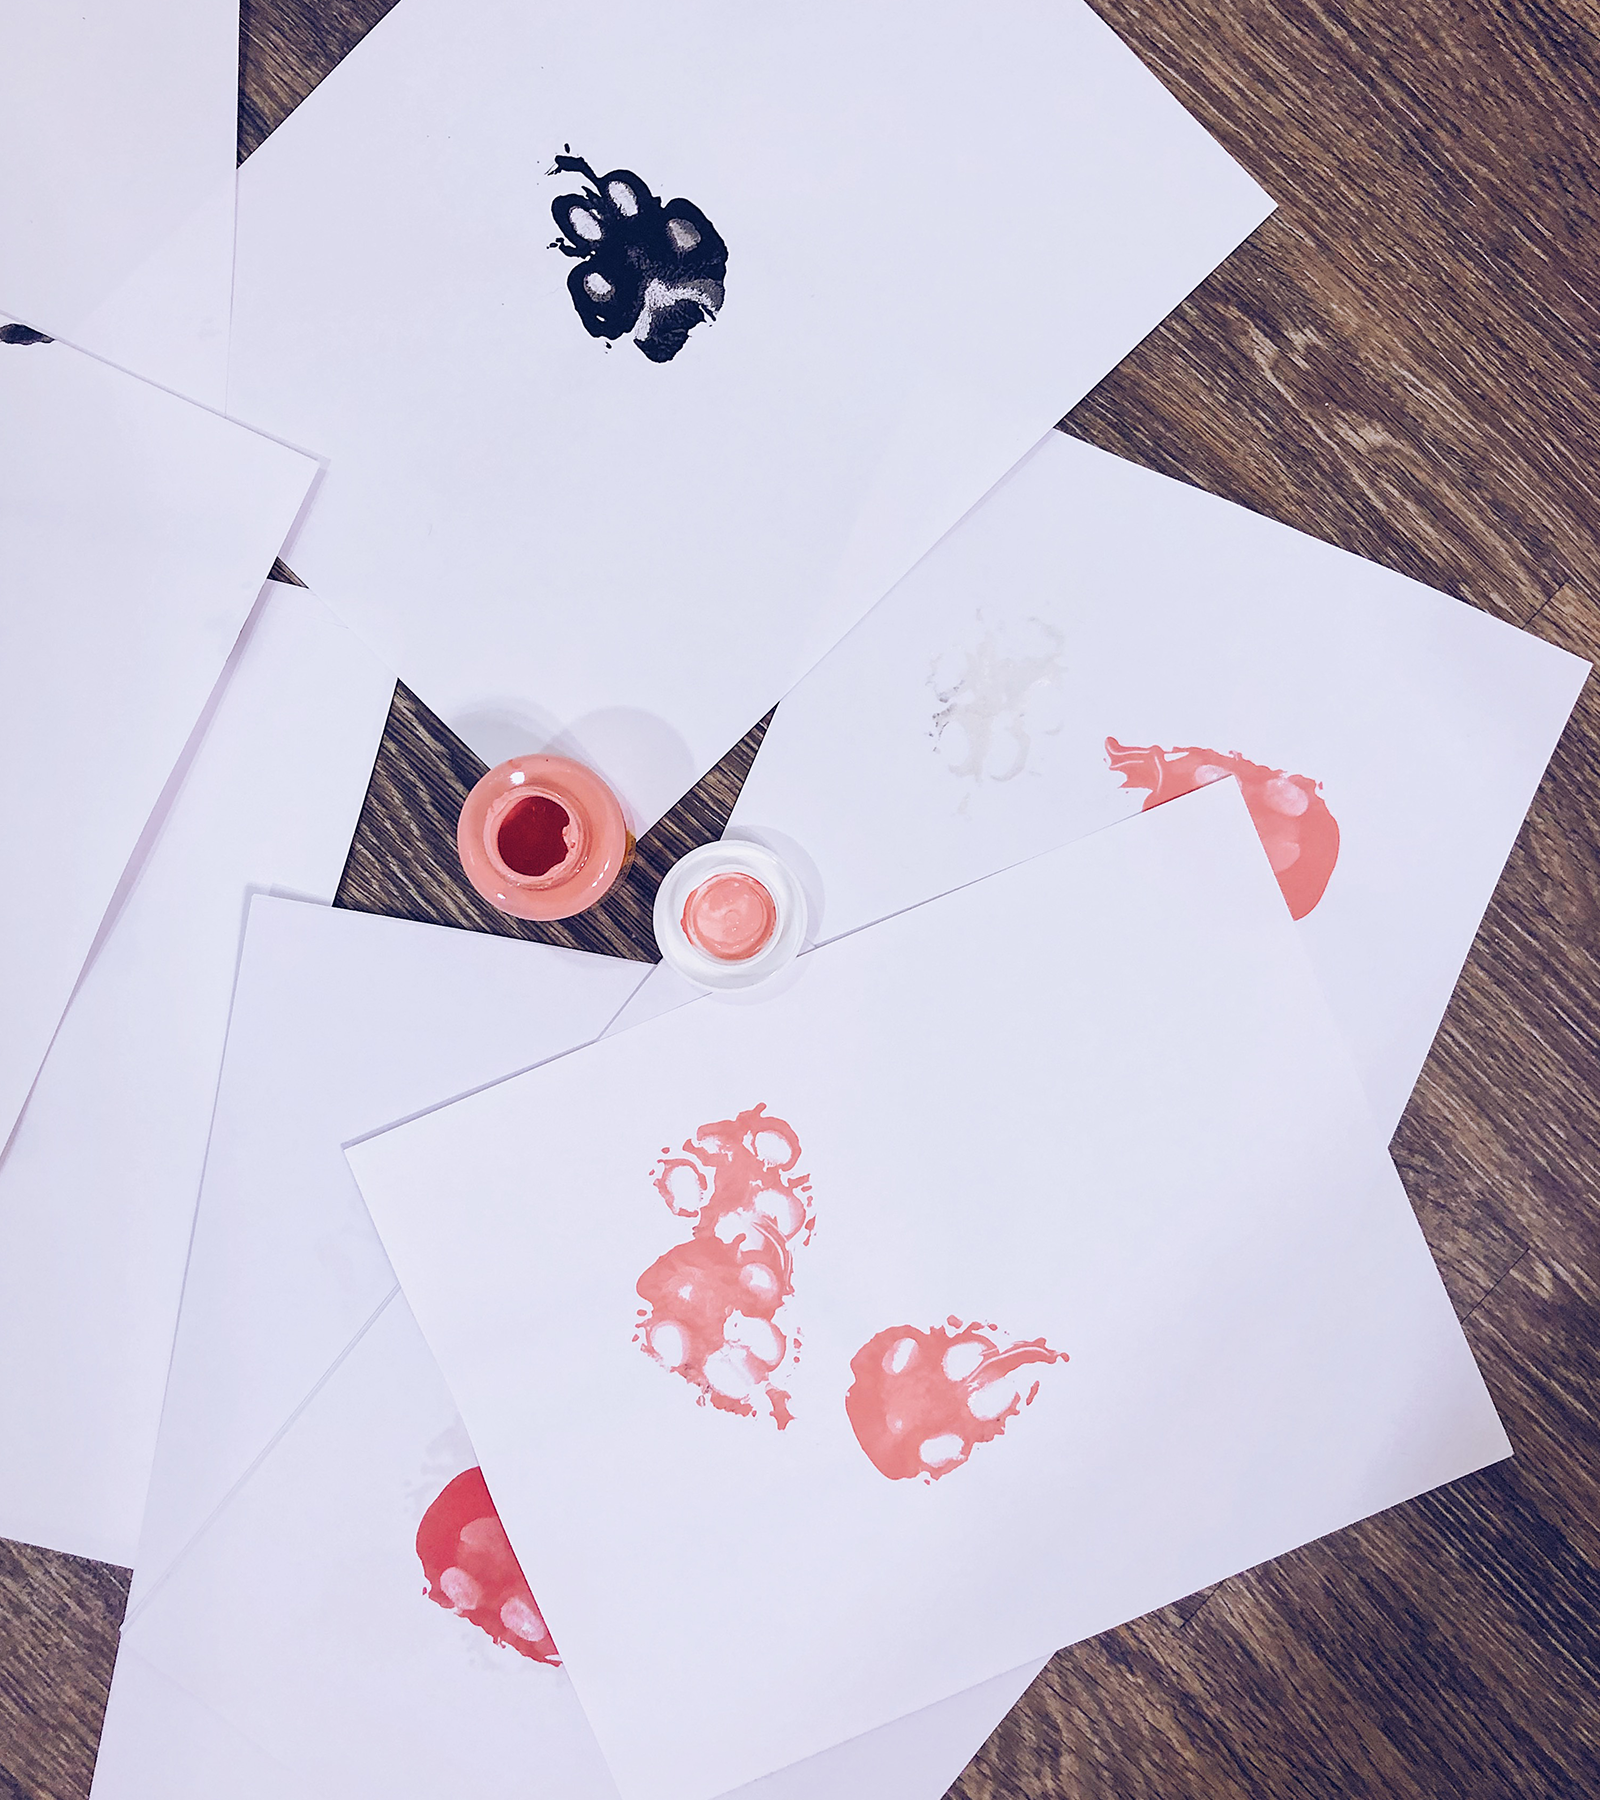
- Pour Paint in Square Container. Pour a few tablespoons of paint in the square container so it’s ready to be dipped with the paw. (If you’re using an alternate color, like I used pink, you’ll want to do those prints first so the color doesn’t transfer. If you use black first, you might get black residue in the next color. Keep in mind, really light colors may not work! I had to use a pretty dark pink to get a good print, and ultimately black worked best so I recommend at least some prints in black.)
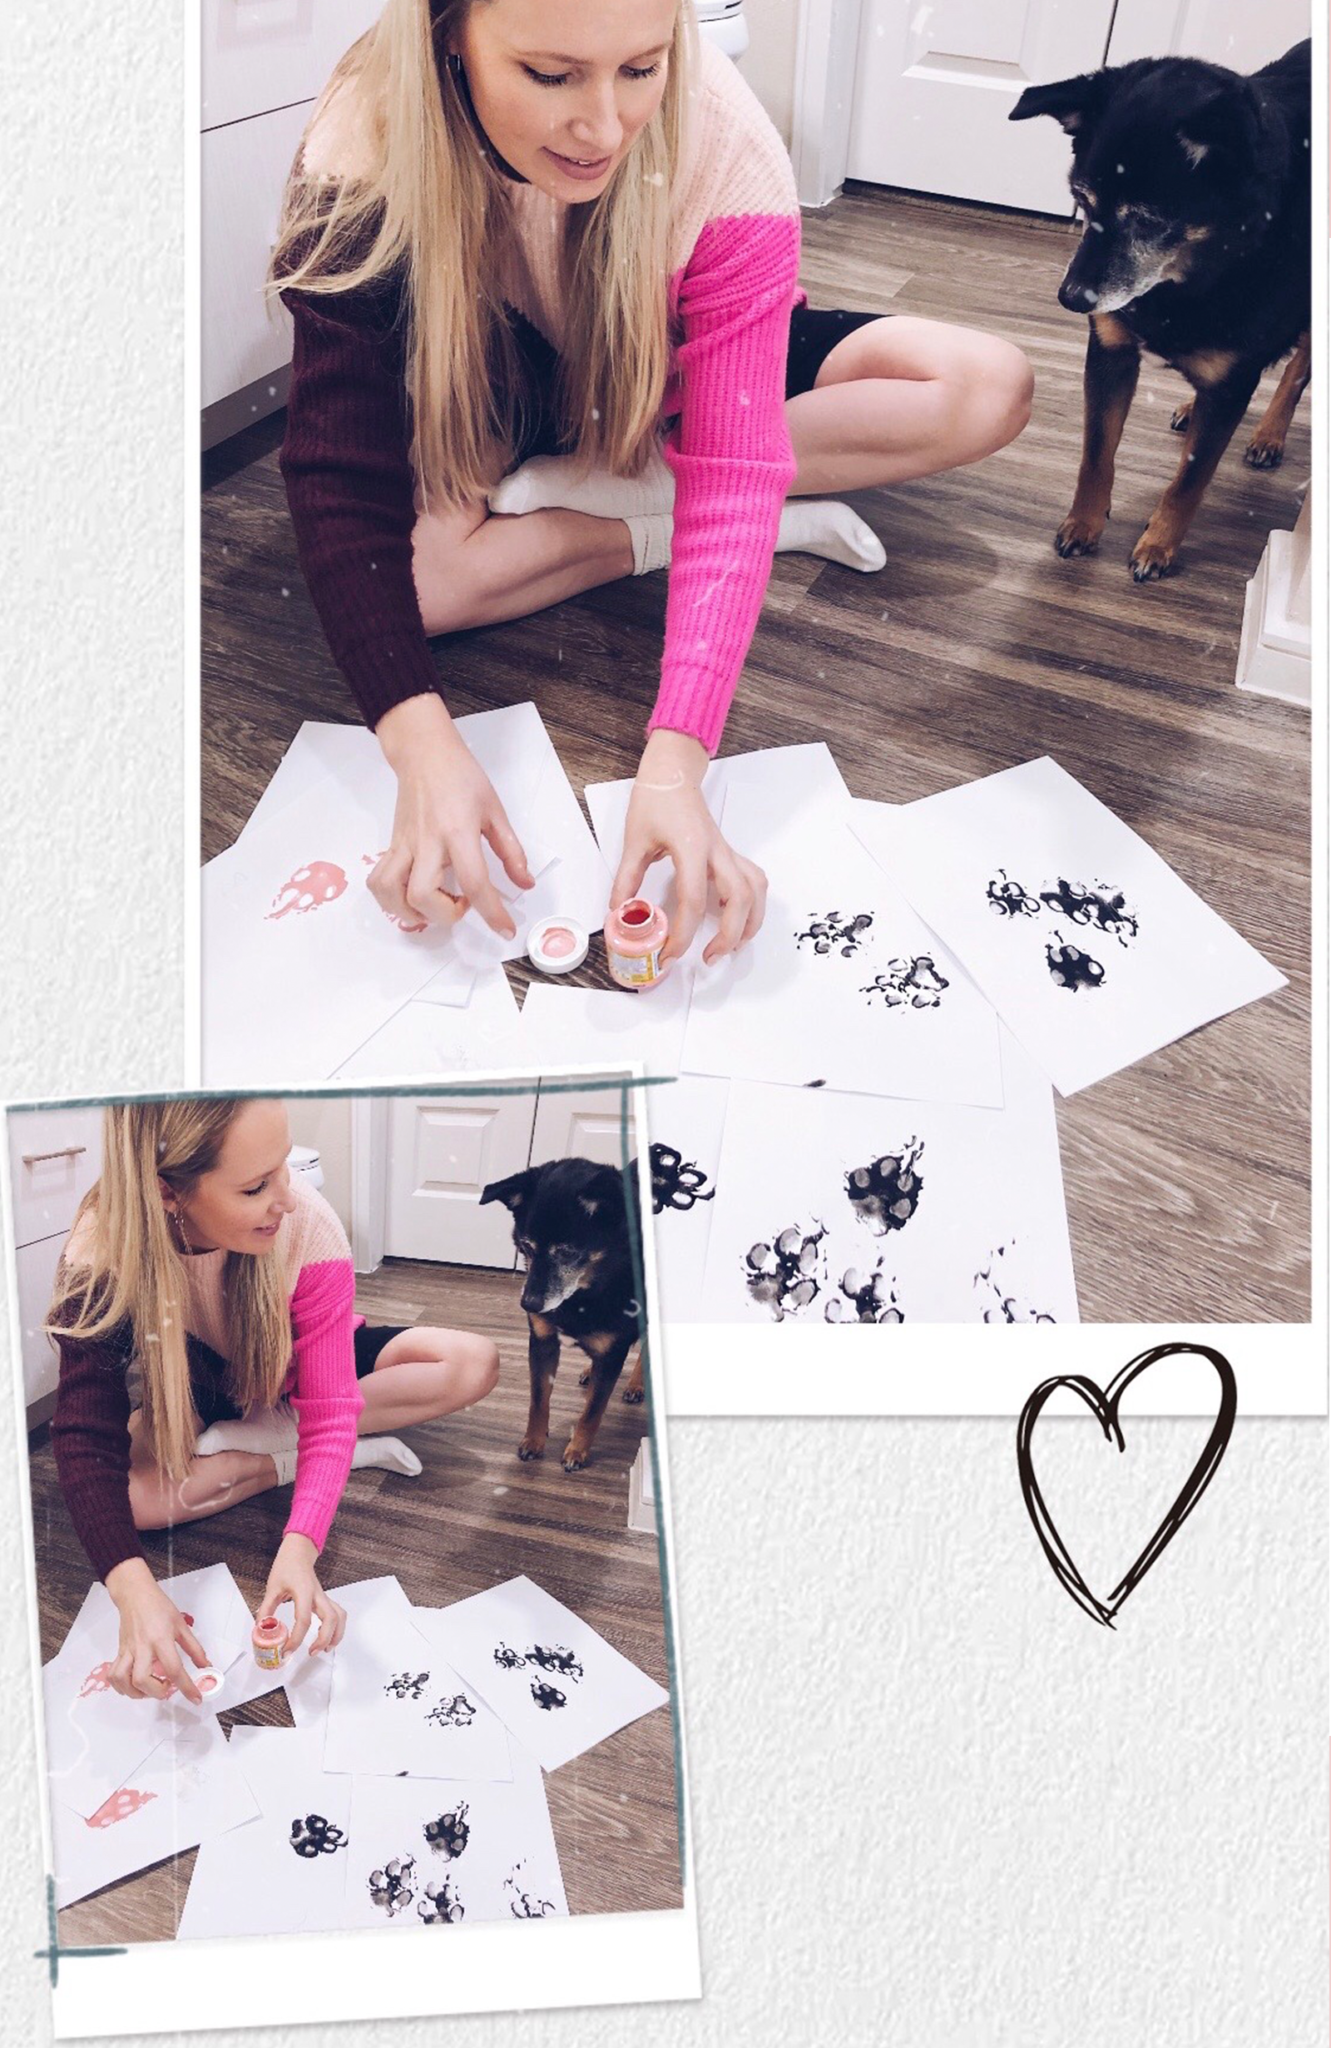
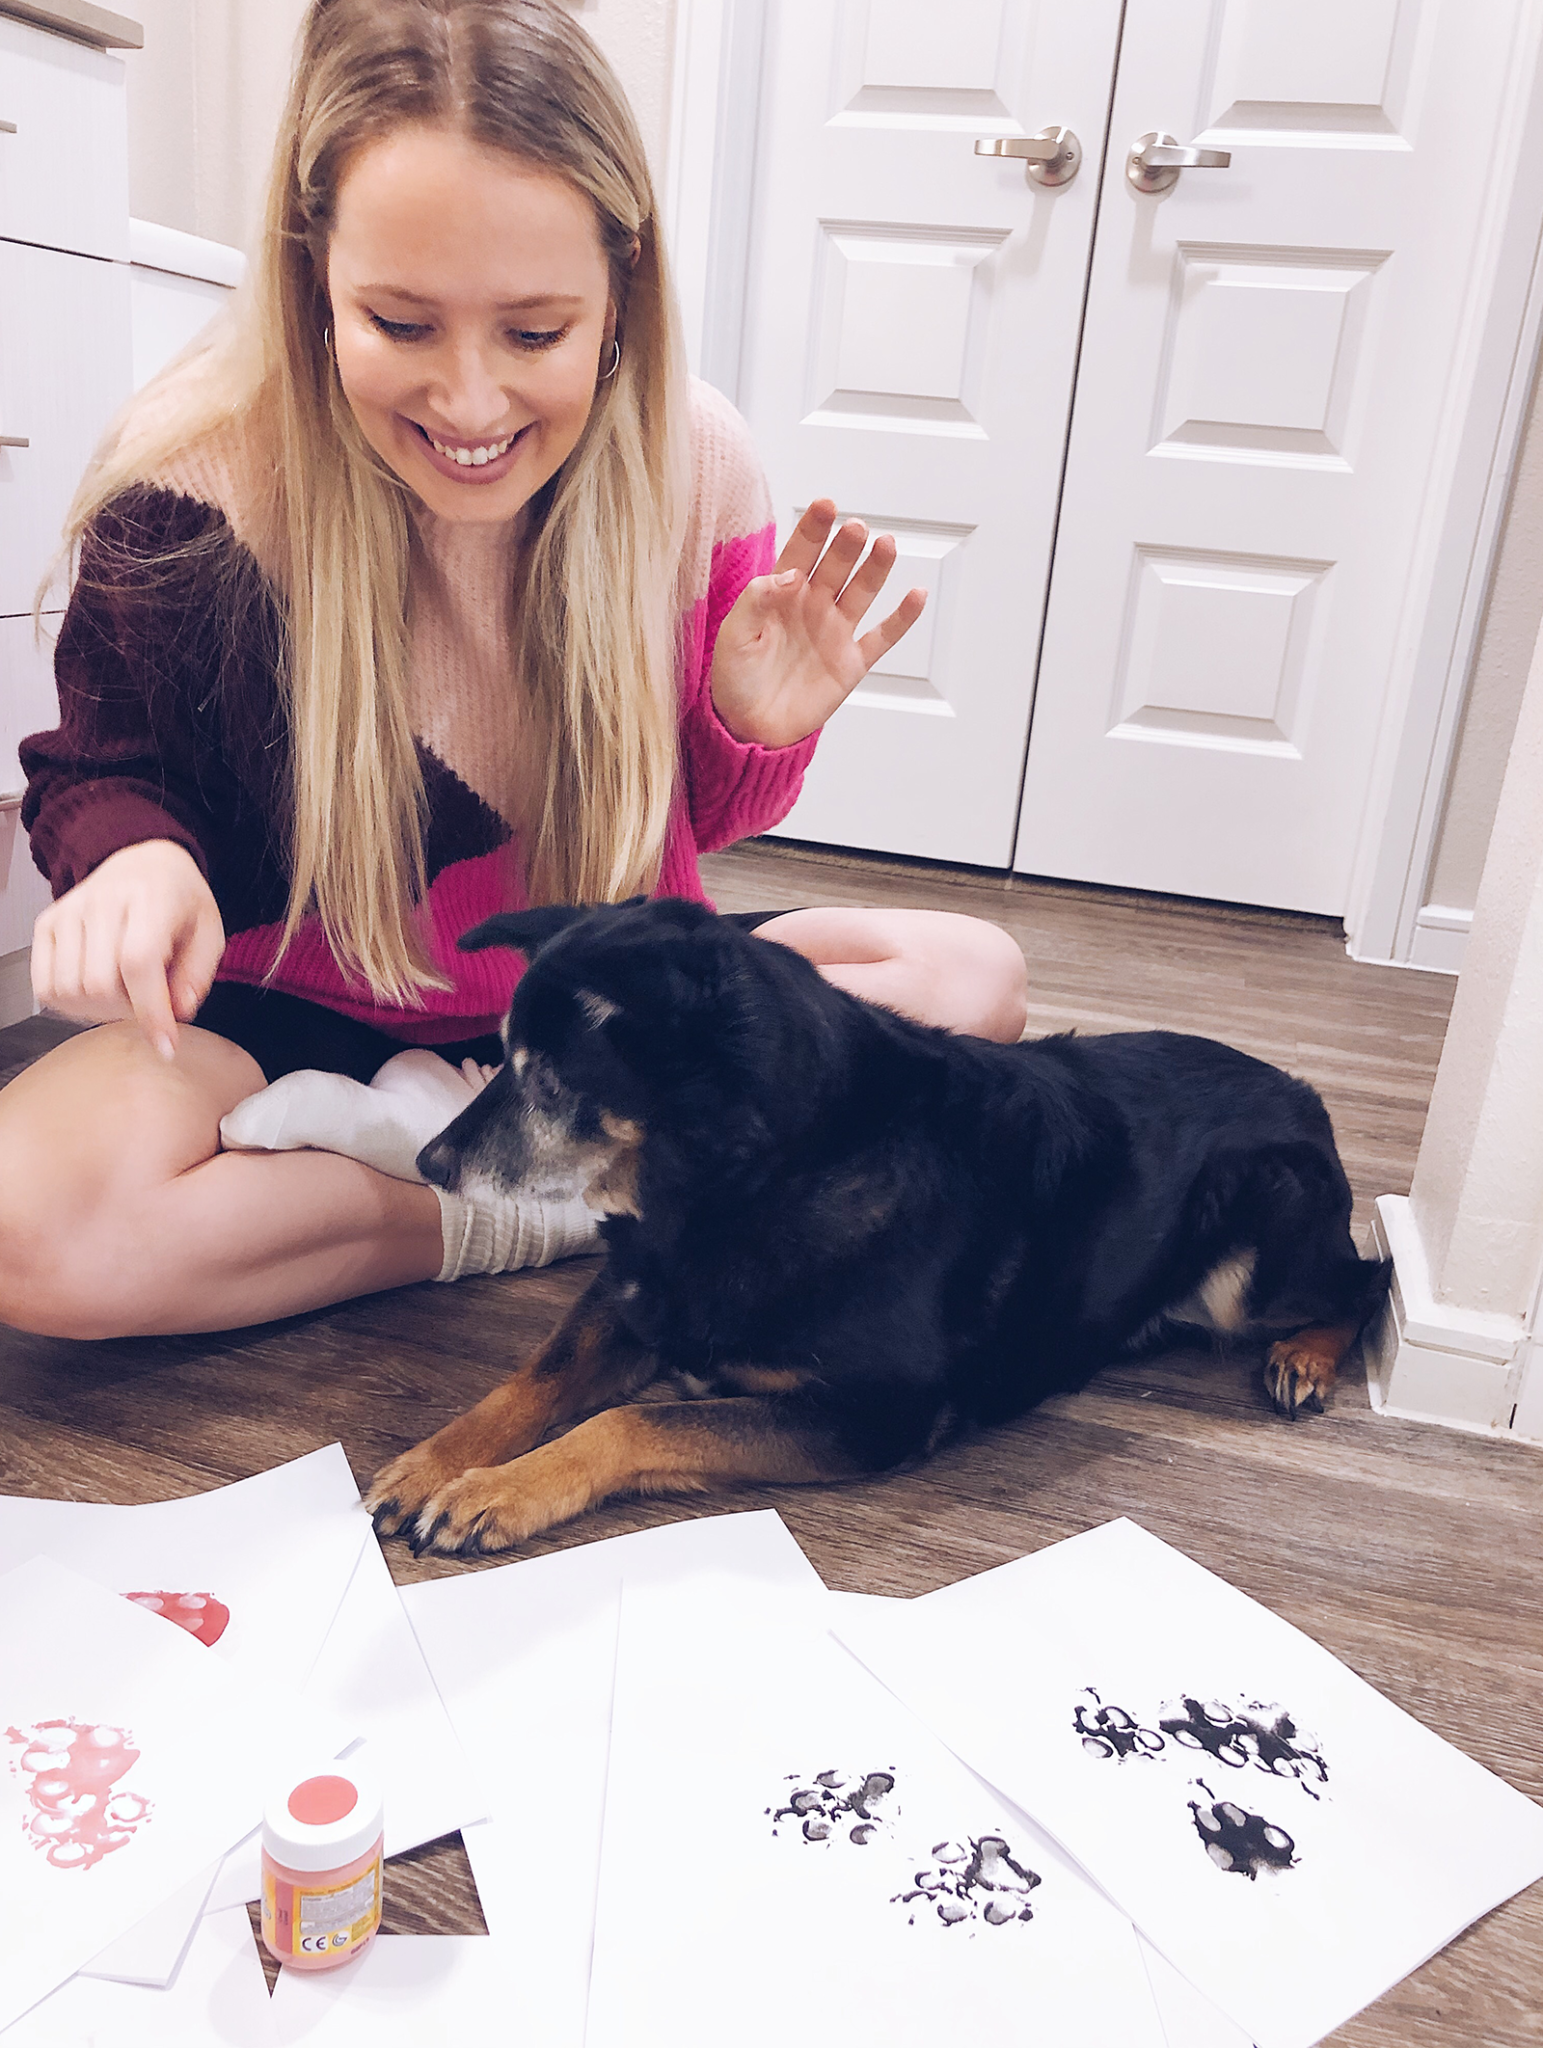
- Grab animal. Time for your fur baby to shine! Take one paw & lightly dip it into the paint in square container.
- Stamp dipped paw on paper. This is definitely the trickiest step. The first print will likely be sloppy as excess paint is on the paw, the 2nd & 3rd prints will probably be the best. The trick is making sure the animal puts their own full pressure on the paw – meaning, they stand up! That will create the highest quality print. I had to use a lot of treats but it worked with patience. If your animal absolutely won’t stand on their own, make sure you press their paw down lightly from all angles. You might have to move the paper if the animal doesn’t help you. I had Bernice stand, I would lift her paw, then move the paper, & have her stand again. So she barely did anything. The prints will be messy, but I visioned it that way. I wanted the outcome to look like Bernice was running, happy & playing – movement! So I didn’t want a perfect paw print, that wasn’t the goal.
- Repeat & Repeat again. Use a lot of paper! Continue dipping & printing until you have a wide variety of prints, you don’t want to put your animal through this again. Experiment with the prints, sometimes layering them, put a few on one piece of paper & maybe 1 print on a few pieces of paper – gather a lot of paw artwork, the more the better!
- Repeat with Black Paint. If you’re only doing black, then skip this step. Make sure you use the water bucket to thoroughly rinse the previous paint, then dry the paw, before using the next color.
- Let Prints Dry Completely. & clean your animal’s paw, then give them treats for their hard work!
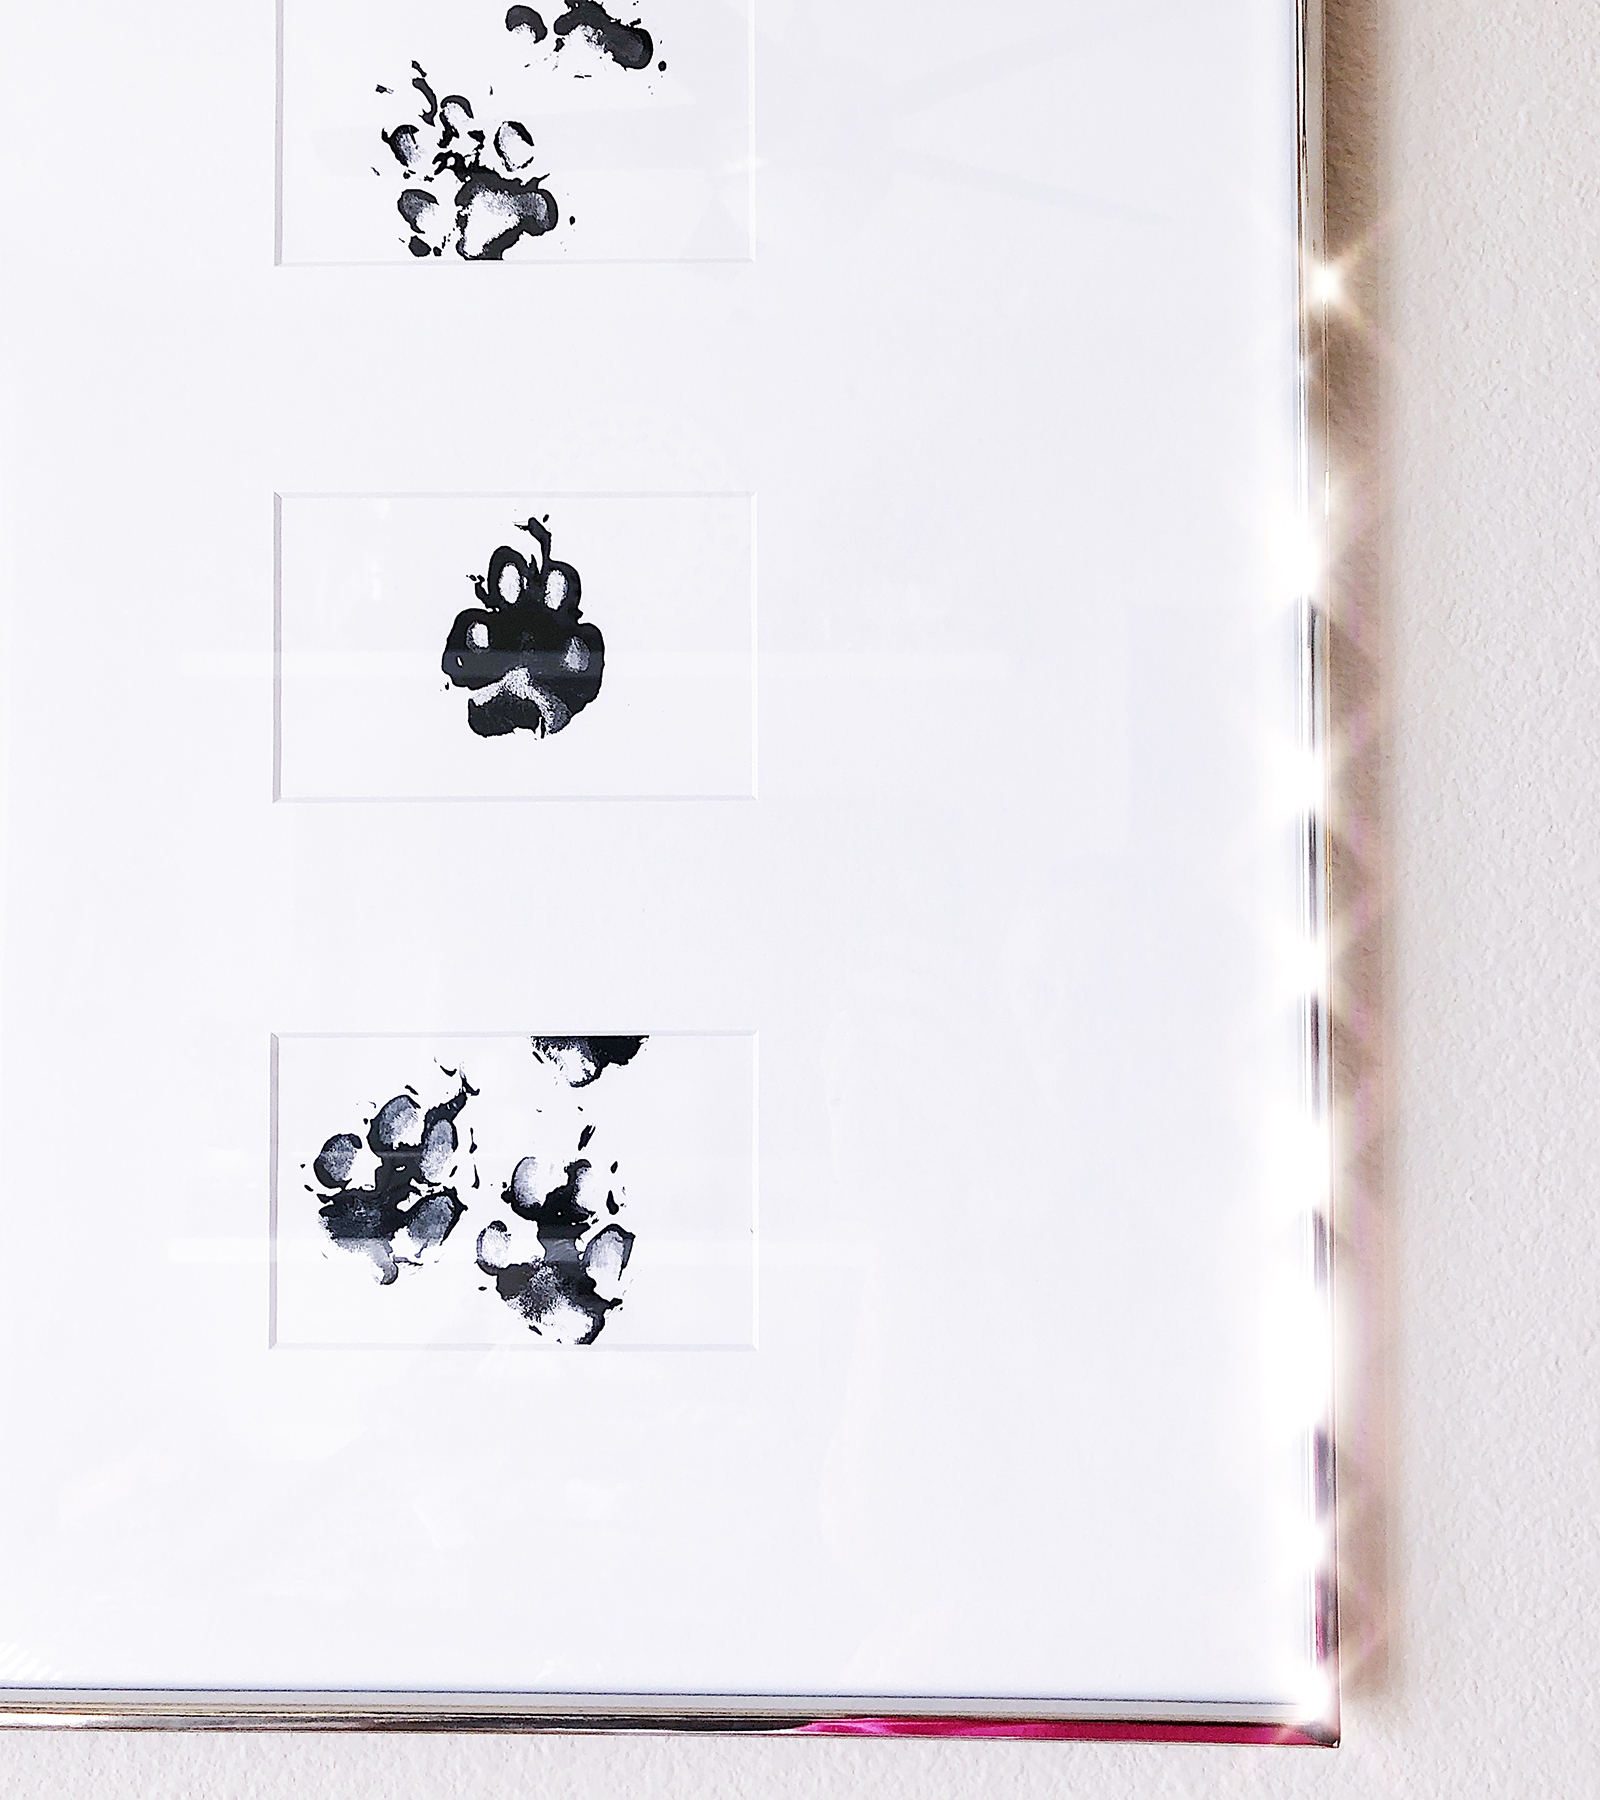
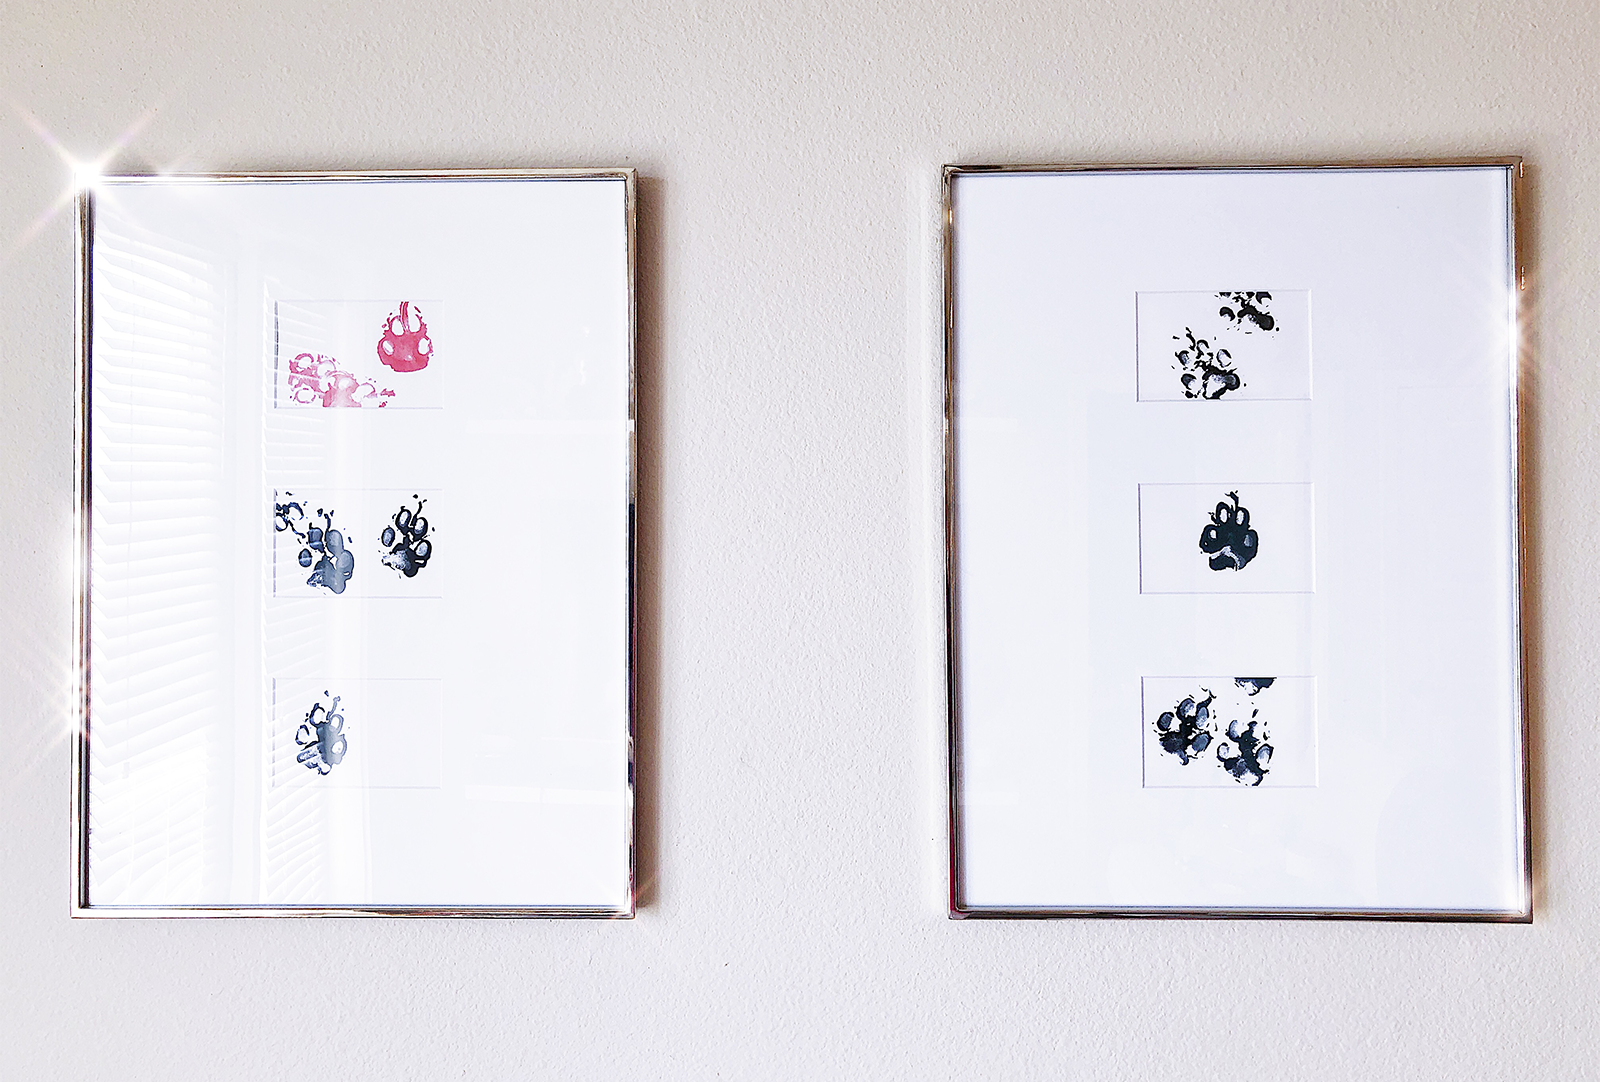
- Copy Prints. This is the KEY step I keep forgetting we did! The paper prints you made won’t look flat & perfect, because it’s finger paints & an animal. To get the prints looking professional, you need a quality copy machine. Send all the prints you think look somewhat decent through a copy machine. I went to FedEx because their copy machine is much better than the one I have at home. I made 2 copies of every print.
- Measure Frame. Measure the frame you’re wanting to put animal prints in & create a pattern. Use a piece of copy paper & draw out the frame size. Then cut it out of the paper so you have an exact idea of the frame size you’re looking to fill.
- Cut prints. Take the pattern you made of the frame size & start laying it over the copied paw print paper. I was able to slightly see through the copy paper so I used the backside & lightly drew around the frame pattern with a pencil so I knew where to cut out the prints I desired. Again, the idea here isn’t to be perfectly centered or perfect prints, I wanted a mixture.
- Frame your prints! I used 2 side by side collage frames from West Elm (here), a total of six dog paw prints. I used all black prints with 1 pink – to add a little dimension, you know? Artsy af. I like how all the prints came together as 1.
I hope you find joy in this project! I can’t believe I didn’t think to share it earlier, it was so fun & easy. I didn’t know how it would turn out but the more I look at it, the more I fall in love with it. Plus, I need to have B’s paw prints in my daily life, forever. I’m sure there are other animal lovers feeling the same way.
If I left anything out in the instructions or links, let me know! I’ll happily hook you up 🙂
I haven’t tried this with other animals, (ie cat, chicken, horse) but I’m sure you could! If you do this project, please share with me so I can see how they turn out!
I love you
be thoughtful
I have a feeling this project will be in my future. I also have a feeling it may not go as well with cat’s but I’ll let you know!
LOL! I’m dying laughing, please do it & share results
This is so cute!
sog0d8
na07og